Showing posts with label Christmas decorations. Show all posts

Tuesday, December 8, 2009

Window Clings

Here is another great Christmas decoration idea.  I found this idea online…I knew my kids weren’t quite old enough to do it themselves this year but I wanted to try it to make sure it worked and it did!!

An easy way to make fun window clings – simply take dimensional fabric paint  (I was making snowflakes so I used white and silver glitter paint).  Make your design on wax paper and let dry overnight.  (If you need to you can draw your design on a piece of paper and place under your wax paper).  After you let it dry for about 24 hours simply peel it away from the wax paper and stick on the window.  It will cling to the window!!

Here are the snowflakes I made.

IMG_0277

We will definitely be doing these every year (I don’t think I will try to save them…I don’t think they will survive the summer heat in the attic) and I am already thinking of ideas for other seasons that we can do with these since they are so easy and so cool!  We could do hearts for valentines, eggs and bunnies for Easter, flags and fireworks for 4th of July, etc… Oh the possibilities are endless!

Monday, December 7, 2009

Making Our Christmas Decorations

We had a busy day today putting up, along with making new, Christmas decorations.  Below are pictures and instructions for the decorations we made!

We made 2 different kinds of Christmas trees. For the first one I took a cone-shaped floral cone and wrapped it with green felt.  We wrapped a red pipe cleaner and a shiny green ribbon around it.  I then had the boys take colored ball pointed straight pins and stick them through the foam for ornaments.  They boys enjoyed this because it was easy for them to do :-).  We then took pom poms and pinned them to the top of the tree and a few more around the tree for added effect.


For the 2nd tree I took a green pipe cleaner and folded it in half and twisted it.  I then took other pieces of pipe cleaner and twisted them around the first piece to make branches.  I stuck the tree in a piece of floral foam.  I then had the boys put plastic beads on the branches for ornaments.  We put a sequence star on the top.


Here are some pictures of the finished trees (on top of the piano mixed in with other decorations).


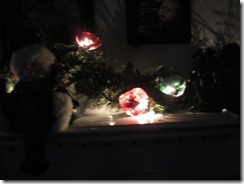
Another thing we did was take some mini foil muffin cups (red and green) and cut a hole in the middle and put them on Christmas lights to give the lights a glow.  Really the only thing the boys could do for this one is point to where they thought I should put them.  They really turned out cool…with all the lights out they have a pretty cool glowing effect.
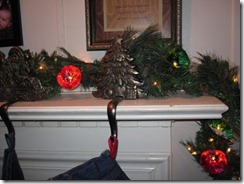
 

I tried to get some pictures without the flash to capture the glowing effect…these pictures really didn’t capture the effect…but they kind of looked cool anyways :-)
Another thing we made was an ornament wreath.  I bought some pretty red balls (some were shiny and some were glittery).  The site where I found the idea said to use a wire coat hanger…but I can never get those to work very well…plus I don’t think I had enough ornaments to fill one of those…so I just used heavy guage floral wire.  I twisted two pieces together to get the size circle I wanted.  We then put on the ornaments (this was actually a good simple patterning lesson…and Aaron did very well with it…he would hand me a shiny one saying “shiny” and then a glittery one saying “gitter”.  I would ask him what was next and most of the time he gave me the correct one!  I was so proud).

Now my wreath looks more like a pile of ornaments instead of  a circle…but I still think it looks pretty :-)


I was so excited when I opened one of our decoration boxes!  I had totally forgotten that we had made garland for our tree last year until I saw it in the box!!  It brought back memories of last year!!  It made me even more excited about this tradition we are starting of making seasonal decorations to enjoy every year!

(this garland was simply a foam bead kit that came with the stringing wire and plastic needle!  We bought two kits and it made enough garland to wrap our 6 1/2 ft tree.)


And don’t you love Alyssa’s stocking?  If you didn’t catch the post about us making this stocking then click here to go see it…it includes a giveaway for a Creativity For Kids kit (any kit you would like to try)


Wednesday, December 2, 2009

Christmas Wishes Ornaments

We have started making our Christmas decorations.  Our new tradition of making seasonal decorations to enjoy and add to year after year got off to a great start with our fall decorations!  Now it’s time to put those away and start on our Christmas decorations.

We started today with our Christmas wish ornaments.  I found the ideas for these here.  I instantly fell in love with the idea and knew that we had to do these ourselves!

I did make some changes to the supplies and steps due to what I had here at the house.  Here is how we made ours:

On the Disney site they called for a wooden spool that you paint…which would be very pretty…but I didn’t have any.  I did have empty plastic spools that I have saved back for crafts.  Since I already had these I didn’t see any need to buy any wooden spools. 
Since I had plastic spools that did not have pretty ends, and I did not want to worry with trying to paint them, I cut out circles from pretty patterned scrapbook paper the size of the end of the spool and attached them with scrapbooking adhesive tape to the end of the spools (oh I punched holes in the middle of the circles before I put them on the spools so that I could thread the ribbon through.
Then I thread through a piece of ribbon through each spool (I found that wrapping the end of the ribbon around the bottom end of a skinny paintbrush helped to guide it through the spool and come out easily on the other side).  Once I got the ribbon threaded I tied the two ends together.  I then used the scrapbook tape to attach the ribbon to the spool where it threads through to keep the spool from spinning on the ribbon.
The site that has the idea stated to cut strips of paper to fit the width of the spool.  I found that party crepe paper was the perfect width of the plastic spools that I had!!  Yeah – no extra cutting!!
So for each spool I cut a piece of crepe paper long enough to put their lists.  If your child is old enough you can have them write their list with a marker on the crepe paper.  Since my kids are too young for that I just had them tell me their list and I wrote it down.
I then attached the list to the spool with a piece of tape (hint – I left some space at the top of the piece of crepe paper so that I could tape it at the bottom of the spool and as it wrapped around the list actually started at the top of the spool.
I then got decorative scrapbook circles and attached them to the end of the ribbon (where I tied the knot) and put the kids name on them!
We hung them on the tree!!  I am hoping that we have started a new tradition with this and this will be our first ornaments to put on the tree every year!